The ABCs of Teaching Yoga
Discover the essential elements you need to successfully teach yoga.
What makes a yoga teacher skilled, effective and relatable? In reality, you could answer this in several ways, but there are some key principles that make up the foundation of a teaching practice. Let’s call them The ABCs of Teaching Yoga.
Surprisingly, the ABCs are not always taught in professional training programs, and many teachers find themselves stumbling through their classes when just starting out. The good news is you don’t have to! I’ve outlined everything you need to know here.
In yoga, your teachings are an extension of your own embodied practice. So I encourage you first to put the ABCs into action on your own mat. From there it will be easy and natural to share them with your students.
Implementing the ABCs as you teach will make your students’ practice safer, more effective and longer-lasting; it will also add depth to your classes and help you relate better to your students’ experience. These principles serve as both a foundation and a means for expanding your teaching practice:
- A is for alignment and awareness.
- B is for breath and balance.
- C is for coordination and connection.
Let’s dive into this Yoga Alphabet, beginning, of course, with A!
A: Alignment
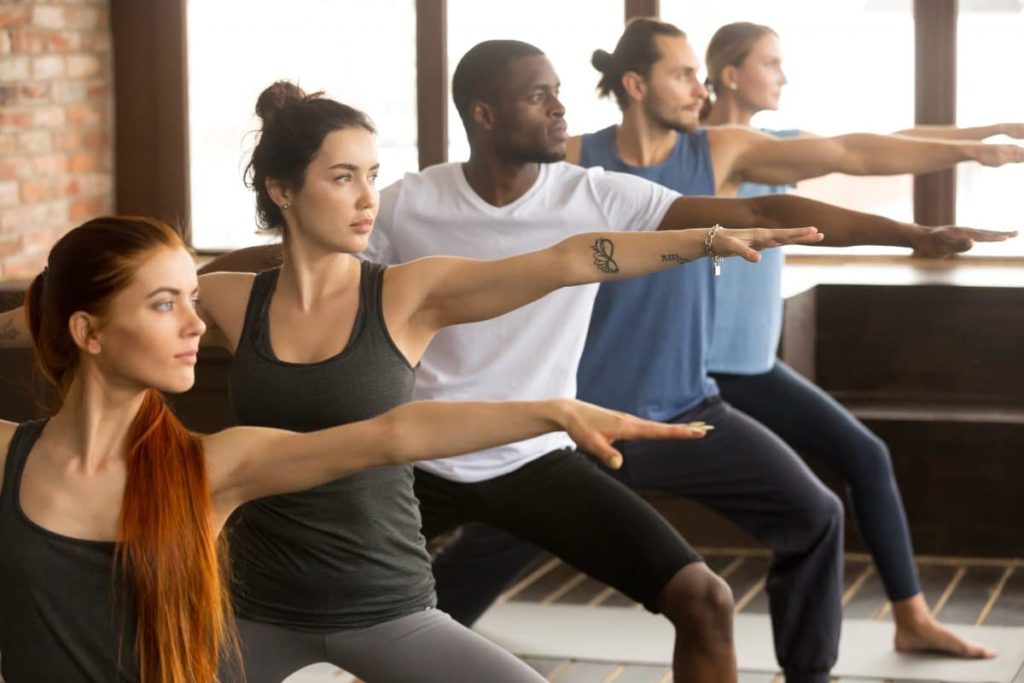
Yoga alignment is both intuitive and subtle, both intelligent and physical. Let’s look first at physical alignment principles, as most teachers will be guiding students through physical postures—or asanas. Always align the three platforms of the body:
- The feet and ankles protect the knees.
- The hip girdle protects the lower back.
- The shoulder girdle protects the neck.
For students to experience a safe, injury-free practice over time, each platform must be in proper alignment. Some people get away with doing postures out of proper alignment for a long time, but then they pay for it with bad knees, achy backs and stiff necks! Alignment is as much about injury prevention as it is about having an effective practice in the here and now.
As you guide students through each posture, cue them to align, stabilize and elongate through the three platforms of the body.
Tip: Start with the foundation! Always cue students through postures from the bottom up. (In inverted postures, you’ll begin with the neck and shoulders.)
Tadasana (mountain pose) is a great posture for practicing alignment at the start of class. This asana also serves as a good checkpoint throughout practice to see how things may have shifted. Try these cues in tadasana first. They will serve as a solid foundation to build on and will be useful in other, more complex postures as class progresses:
Align the feet and ankles. Properly aligned feet and ankles will protect the knees from torquing, overextending or folding in an undesirable way.
Align the hips. This will guard the lower back and subsequently protect the rest of the lumbar and thoracic spine.
Align the shoulders. Shoulders in good alignment will protect the neck and cervical spine from injury.
Editor’s note: For more on cuing tadasana, see “Yoga for Optimal Performance”.
A: Awareness
Awareness is truly what makes yoga yoga. Without focused awareness, yoga can easily become a glorified calisthenics practice. Try these methods of inviting your students’ minds to tune in to their bodies and tune out what is not serving their practice.
Tip: Do these exercises in the very beginning of class. Make it a priority to move awareness from the external to the internal.
Simple guided mindfulness. Sometimes busy minds are in need of shepherding. Create a channel for your students’ minds to flow with ease. You can do this through mindfulness of body (moving from head to toe), mindfulness of breath or a creative visualization.
Deep breathing. Never underestimate the power of a few deep breaths to calm the mind and reel in focus. A simple 4-count breath (4 in, 4 out) is balancing and calming, as is the nadi-shodhana breath, also called alternate-nostril breathing. To perform this breath, manually close your right nostril with your thumb and inhale through the left nostril. Pause, closing both nostrils with your thumb and middle finger. To exhale, keep the middle finger on your left nostril and breathe out through your right nostril. Then, reverse it: Inhale through your right nostril, pause and exhale through your left nostril. Repeat up to 16 times.
Just sit. This can be challenging for some people, but the fruits are plentiful once the practice becomes established. For the first 5 minutes of class, just sit comfortably in stillness with your students. It will benefit them and you!
Recite a mantra. One of my favorite ways to establish focus is by saying a mantra. A mantra is simply a repeated word, phrase, statement or sound that can be voiced aloud or internally. The process of repetition provides focus, adaptability and concentration for the mind, just as asana practice does for the body. I usually do this in call and response, where I say a line of a chosen mantra (or chant), and the class repeats it back aloud. In my personal awareness practice, I’ve also found it helpful to use a meditation mala (beads).
B: Breath
Breath is a constant thread of the practice. It is always available as an object of awareness. In every posture, from simple sitting meditation to the most complex twist, the breath is there and willing to guide you deeper into awareness.
Try it now! Close your eyes and try to follow your breath for three in-and-out cycles. You may be surprised how tempting it is to get off track. Just do your best to keep coming back.
Teaching your students to be aware of their breath is essential. It is their best gauge in knowing if they are “pushing it” beyond a safe limit, or if they are slacking off when they should be “upping the ammo.” Do your best to cue every major movement with breath. (Example: “Inhale: Lift your arms overhead. Exhale: Draw your low ribs in and extend your tailbone toward your heels.”)
The typical breath used in a vinyasa yoga practice is the ujjayi breath. Uj means “upward,” and jai means “yes!” or “victory!,” so the ujjayi breath is an “upward victorious breath.” It is sometimes called “ocean breath” because of the slight constriction in the epiglottis. The epiglottis is the small, moveable “lid” above the larynx that prevents food and drink from entering your windpipe. When the epiglottis is purposefully constricted, it restricts airflow and creates an ocean sound (Briggs 2007). Perform the ujjayi breath through the nose, with the focal point of the inhalation being the breast plate and the focal point of the exhalation being the pelvic floor.
Tip: Offer reminders throughout practice for students to check in with their breath. Sometimes a suggestion to be aware is all they require. If they need more encouragement, emphasize your own use of breath. Exaggerate the sound of your ujjayi breath as you flow through asana practice with the class.
B: Balance
Balance is key. Yoga sutra 2:46 says sthira sukham asanam. This can be translated into “Each posture should be done with a balance of both effort and ease” (Desikachar 1999). This concept can be applied to each posture and to the class trajectory as a whole.
To help create balance for your students as you teach, cue postures sequentially. Reinforce the foundation of each pose before encouraging more challenge in complex postures. Even in a power class, you can offer a full warmup and cooldown so students feel balanced at the end.
While many students are eager to fit themselves into the “perfect yoga body,” remind them that they are right where they are supposed to be. Encourage stability before flexibility, and tailor postures to fit the needs—and to balance the imbalances—of your class participants.
Note: It is essential that, as a teacher, you are balanced in your own practice. Many teachers jump head-first into a heavy teaching schedule, leaving no time for their own practice. This quickly leads to burnout, and your students feel that! Make sure you are taking care of yourself and doing your own practice diligently.
C: Coordination
Sometimes yoga can feel like a challenge akin to rubbing your belly while patting your head! You’re trying to balance on one foot, draw in mula bandha (the energetic root lock in the pelvic floor), focus your eyes and breathe—all at the same time! The complexity can overwhelm many students. Remember that their coordination is being guided by yours.
As a teacher, learn to listen to your students’ subtle body language. Notice if they are hearing a cue and implementing it—and move on to the next one only when you see that they have responded.
Tip: Give general instructions prior to specifics. Gross motor movements should come before the fine-tuned energetics of each pose.
Always give your students enough time to integrate what you’ve said before moving on. It may take time before you, as a teacher, feel confident in your art of coordination, especially if you are teaching all-level classes. Over time you will learn to read the room and coordinate your classes to fit the needs of those in front of you.
C: Connection
Connection is inner and outer. As a yoga guide, you are helping students find their own inner connection. But it is not just your words and suggestions they will listen to. Your own inner connection becomes evident as you share with a group, as you speak aloud and as you demonstrate postures.
Strive to deepen your own connection to the light within you. Your personal practice becomes your teaching practice. In diving in deep to your own inner space, you are subconsciously giving permission to your students to do the same.
Tip: Share your energy and authenticity. Connect to your true voice. Students want to learn from you.
Forming an “outer” connection with your students can also help to transform their practice. Making eye contact and personalizing cues when appropriate will help people feel fully seen and supported. Always make sure you are visible to your class, as many students are visual learners. Mirror practitioners if possible, so you remain face to face with the group.
Are you ready to take your teaching practice all the way to Z? The true art of teaching involves more than mastering a few skills. It takes an honest commitment to the practice, a willingness to evolve and the ability to listen to your students’ needs.
To effectively transmit the embodied teachings of yoga, practice being a teacher, not just an instructor. What’s the difference?
Instructors pass on knowledge, usually in a scripted manner, similar to reading from a curriculum, and may not truly understand what they are saying or why. They likely think, “This is how I was taught to do it,” without questioning.
Teachers understand the hows and whys behind the material and meet students where they’re at. Teachers modify their approach to address different learning styles and to engage every student. They never share material without knowing why it is relevant, whether it’s for safety, tradition, challenge or self-growth.
References
Briggs, T. 2007. Breathing lessons. Accessed Oct. 9, 2018: yogajournal.com/practice-section/breathing-lessons-2.
Desikachar, T.K.V. 1999. The Heart of Yoga: Developing a Personal Practice. Rochester, NY: Inner Traditions International.

Stacy McCarthy
Stacy McCarthy is an award-winning and internationally recognized fitness and yoga expert, making significant contributions in inspiring the world through the body, mind and spirit. She is a multiyear finalist for IDEA Instructor of the Year, and a college professor of kinesiology, health and nutrition, specializing in yoga studies; her students affectionately call her Yoga Namastacy. Stacy has developed a collection of best-selling videos, books and trainings, and has contributed her expertise to countless media outlets and conferences. Since 1983, she has created trainings that are physically balanced, energetically empowering, mentally focusing, spiritually uplifting and designed to transform lives.