Teaching Yoga at the Wall
Take your mats to the four edges of the studio to teach alignment and offer additional support.
As a yoga teacher, you guide participants through a practice that deepens their understanding of asanas (poses) and how these take shape in students’ bodies. You cue, coach, align, adjust, demonstrate and discuss, and you offer tips on breathing, anatomy, “feel” and sensation. Often, the most effective way to help participants understand a specific element is to slow down, grab a prop or two, and work a little deeper. You may have access to straps, blocks and bolsters, but you might be forgetting another perfect “prop”: the wall.
The wall is an effective and versatile tool that can be easily integrated into classes and private sessions. If you’re teaching a flow practice, you can instruct participants to set their mats right up against the wall and incorporate it into the sequence. If space is limited, bring students to the wall to do focused work a few at a time. The proprioceptive feedback will often help a yogi to “get it” when all your cues and hands-on adjustments don’t. In your next class, try the following options and cuing suggestions for teaching yoga at the wall.
Standing Forward Fold
The goals here are to teach participants how to connect with the core, how to keep the sit bones over the heels, and how to engage the quads while keeping the legs straight. Many students will immediately push their buttocks back into the wall and feel they are going to fall forward—this creates awareness and gives them feedback about their hamstring flexibility. Try these cues:
- Stand with your back to the wall, feet together, approximately 4–6 inches from the wall. Keep the heels under the sit bones and have no contact with the wall.
- Exhale, arms by your sides, and slowly fold forward by hinging at the hips, keeping the spine lengthened, quads engaged and knees neutral.
- If needed, lightly place your hands on the wall for balance as you fold, but don’t let the sacrum or buttocks touch the wall.
- Go slowly and control the pace, stopping and settling in when you can no longer keep the knees neutral.
- If you have extremely limited hamstring flexibility, step away from the wall and find the placement that works best for you. Put a block behind your heels to create space and give yourself something to feel at the back of the feet.
Half Moon (Ardha Chandrasana)
In this pose, placing the foot against the wall helps with balance and grounding, enabling participants to focus on the hips without worrying about the balance
element.
- Stand approximately leg length away from the wall. The right foot faces
forward. - Place a block slightly forward and to the R side of the R foot.
- Place the R hand on the block, reach back with the left foot and place it on the wall, toes facing L, with R knee slightly bent.
- Engage the R quadriceps as you straighten the R leg and rotate the R hip underneath.
- Press the L foot firmly onto the wall, engage the L quadriceps and straighten the leg.
- Let both the R rib cage and the R shoulder rotate underneath, following the motion of the R hip, as the L side of the body opens and aligns over the R side.
- Finish the pose by reaching the L hand to the ceiling and softly gazing toward the L hand. (Note: This is a great place to work in and out of the R hip rotation without worrying about the “finished” posture.)
- Repeat, opposite side.
Warrior II (Virabhadrasana B)
For this pose, turn the mat lengthwise against the wall. As students bring their feet and legs into warrior II, the outside edge of the front foot and knee are just far enough from the wall that a block can fit between the knee and the wall.
- Align the back heel with the front heel (or have them slightly wider apart if needed), and turn the back toes slightly forward.
- Press the front knee firmly into the block and hold it against the wall; at the same time, externally rotate the front hip so it moves down, under and away from the wall.
- Try to keep the front hip off the wall; notice the opening in the front of the hip and groin.
- Lift the inner back leg while rooting into the back edge of the foot, keeping the back knee straight.
- Reach both arms outward in line with the legs. The shoulder blades should be equal distance from the wall. (Note: Place an additional block behind the back shoulder blade or use your hand to give students tactile feedback.)
- Switch sides.
Extended-Hand Big Toe (Utthita Hasta Padangusthasana A)
The wall creates stability and decreases the balance challenge in this pose, allowing participants to straighten their legs and better understand how the hip and leg work together.
- Stand facing the wall, approximately leg length away.
- Root into the L foot and place the R foot on the wall at hip height, with a slight external hip rotation (aim R foot at “1 o’clock”).
- Engage the quadriceps and straighten the leg, keeping the knees neutral.
- While the R hip is externally rotating and the R foot is grounded into the wall, stabilize with the L leg by creating the feel of a slight internal hip rotation. Firmly press down the big-toe side of the foot.
- Stand tall, aligning your shoulders over your hips. Draw the shoulder blades slightly down and back.
- Reach out with the R hand as if to grab the R big toe, creating the “feel” of the finished pose.
- Repeat, opposite leg.
Noose (Pashasana)
In noose pose, participants balance on the balls of their feet, heels raised, lowered into a deep squat while twisting. The balance aspect can be challenging, particularly if there is tightness in the feet, ankles or lower legs. The twist, therefore, is often compromised, and the hips tend to shift instead of staying stable. The wall not only provides stability for the hips but also helps with balance by supporting some of the body’s weight.
- Back up to the wall, squat down, and anchor the hips against the wall while squeezing the legs together and lifting the heels off the floor. There is a deep hip hinge, so the spine is angled forward, away from the wall. The upper buttocks should feel the wall.
- Twist to the R and firmly press the L buttock into the wall, maintaining contact and keeping the hips stable.
- Place the L hand outside the R knee to support the body in an upright and open posture.
- To deepen the twist, place the L elbow outside the R knee and close the hands in prayer pose. As you rotate, the right elbow will turn toward the wall.
- Practice twisting on both sides. (Note: Allow students to stand up between sides if needed.)
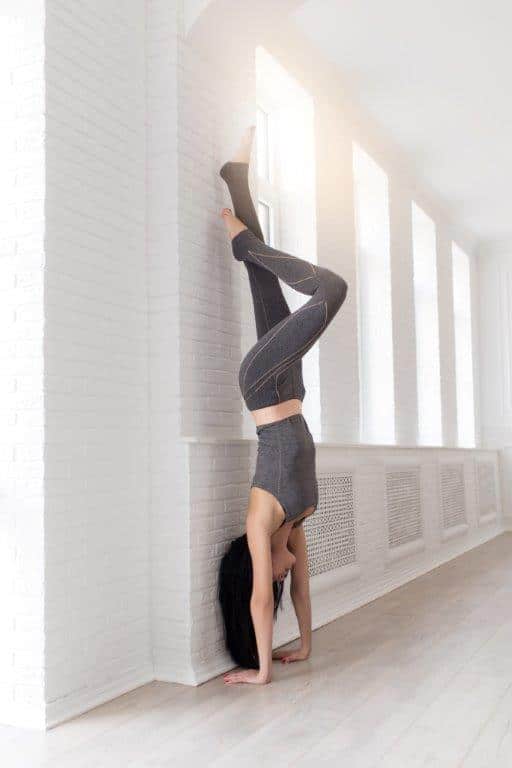
Handstand Prep
This preparatory pose is great for students who aren’t ready to fully invert or who are fearful of doing handstand. Looking at this posture from the side, it should appear that the hips are slightly behind the spine as students press the torso toward the wall. If the feet are sliding down, have participants move a bit closer to the wall, and/or cue more attention at the arms.
- Stand slightly less than leg length away from the wall, facing out.
- Place the hands on the mat shoulder-distance apart (as if you were going to perform a plank), and place one foot at a time on the wall.
- Initially keep the knees bent; heels should be hip height.
- As you press into the wall and straighten the legs (creating a 90-degree angle at the hips), press firmly into the hands and arms, torso toward the wall. The upper body is in the position of handstand while the legs are supported on the wall.
- Keep the arms strong and the shoulder blades reaching toward the hips (upward!), core engaged.
- Take breaks as needed, as this work can be challenging.
Legs up the Wall (Viparita Karani)
As simple as it may seem, this pose is a fabulous alternative to any inversion and a great option for final relaxation. The lower back is supported on the mat, and the legs are elevated and supported, creating a stable and comfortable posture. The pose gives participants who don’t want to go upside down the benefit of an inversion without having to perform a headstand, handstand or shoulder stand. Legs up the wall is also a nice option for those with lower-back discomfort, students who stand or walk all day, and those who just feel more relaxed in this pose than they do in savasana.
- Lie supine with hips close to the wall.
- Bring both legs onto the wall, a comfortable distance apart. Let the arms lie comfortably at your sides.
- Hold for 3–5 minutes, or as tolerated.
Yes to Walls!
Be open to exploring yoga at the wall, and try it during your own practice. Integrate a few of these postures or enhance other poses by using the wall creatively. Knowing how to use the wall as a prop is a great “go-to” teaching tool and provides useful tactile feedback and a new perspective for students.