Cuing for Pre-Hundred
Deconstruct a classic Pilates move for best effect.
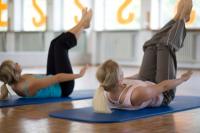
When you look at classic pictures of Joseph Pilates performing the hundred, it’s hard not to notice that his form isn’t quite what we see today in many studios or classes. Typically, he appears with his legs 2 inches from the ground, arms at about a 45-degree angle, beautifully coordinated. The Pilates hundred is one of the first exercises performed in a classical routine. It coordinates breath with movement, increases circulation, and stabilizes and warms the body (Siler 2000).
Contemporary and rehabilitative approaches to Pilates have led to a variety of modifications, including adjustments to the order. Many instructors agree with and adhere to the original philosophy of the hundred—but often what they see doesn’t match the image of Joseph Pilates. In fact, the picture many clients present is this: a strained and slightly (or sometimes very) red face, bulging neck muscles, limp legs and arms aimlessly flapping in the air. You, as the instructor, may have several cues flashing through your head to correct the movement, but the only thing that comes out is, “Okay, so let’s relax and bring the arms, legs and head down and just breathe.”
In other words, you need time to breathe so you can organize your thoughts and figure out how to make this movement successful!
How can you ensure that this classic move is a winning one for clients? One suggestion is to look at the components of the hundred and break it down, turning it into a “pre-hundred.” Create success with each piece, and then put the pieces together for a beautiful set. This is an approach that Kendel Pink, owner of Studio 3 Pilates in Anaheim, California, and director of the Pilates certification program for Long Beach Dance Conditioning, teaches her clients. She takes them through a series of movements, and before they know it, they are performing a successful set, even if they do only 50 or 10 repetitions.
The Pre-Hundred
Here are four pre-hundred components that Pink teaches:
1. Start with breath work. Have the client begin in a hook lying position if necessary for alignment, with a ball between the knees. Ask her to bring attention to the weight of her body on the mat. Is there more weight on the right hip or the left hip? Is the back tight? Head aligned? Perform 5–10 deep breaths and check to see if the client can relax the back, find neutral pelvis and engage the core muscles.
2. Focus on arm work. Ask the client to turn the arms so the pinky fingers are down toward the mat. This alignment opens the shoulders, widens the clavicle and provides feedback for working the backs of the arms. Stay with the breath work, and have the client gently press the pinky into the mat and hold. See if he can find the connection or demonstrate awareness that the latissimus dorsi and triceps are working.
Once he finds this connection, have him lift the arms off the ground about 2–4 inches. Does he still have the awareness? If so, have him perform 5–8 arm lifts and presses through the appropriate range of motion (i.e., to the point where he can lift the arm and keep the connection or muscle engagement in the backs of the arms). If the client has tight pectoralis or latissimus dorsi muscles, he will have a small range of motion, and the higher he lifts, the more the shoulders will internally rotate. Once your client successfully completes a set of presses, have him do a set of 5 small pulses, emphasizing the same ideas.
3. Focus on leg work. With the client in hook lying position, ask her to visualize that she is dragging her heels toward her buttocks to activate the hamstrings, while maintaining a neutral pelvis. If she can successfully engage the muscles with knees bent, let her move on to straightening the legs with a small amount of turnout (Pilates V position). From here, cue “heels together” to activate the adductors and lower the abdominals. Have the client gently press the heels into the ground to keep the hamstring connection.
4. Focus on the roll-up. This is probably the most difficult of the movements and where you will see everything fall apart—and it will happen quickly. If your client has challenges, consider using props such as balls or bands. However, try to get the client to roll up without props. Cue him to lengthen or create space between each vertebra and the next in the roll-up.
The Hundred
Once you have successfully broken down the movement, you can slowly bring your client into the hundred. Start with the breathing, add the arm pulses and then add the leg lift. Add the curl-up last. Hopefully, you have drawn the client’s awareness to the work in the body instead of the strain. Cue only as many repetitions as the client can perform while maintaining good form.
While many clients may never perform the hundred with the legs 2 inches off the floor, at least they will experience the work for what Joseph Pilates meant it to be: breath coordinated with safe, efficient movement.
References
Siler, B. 2000. The Pilates Body. New York: Random House.
Natalie Imrisek, MSPT
Natalie Imrisek, MSPT, CSCS, graduated from Columbia University with a master's degree in science of physical therapy. She specializes in working with dancers and performers. In 2009, she supplemented her physical therapy background by obtaining a Pilates certification through Balanced Body University. She can be reached at www.facebook.com/natalieimrisek.cscs or nataliephysicaltherapy.intuitwebsites.com/.