Cuing in Three Dimensions
Add a layer of confidence to your Pilates teaching skills with cues for different learning situations.

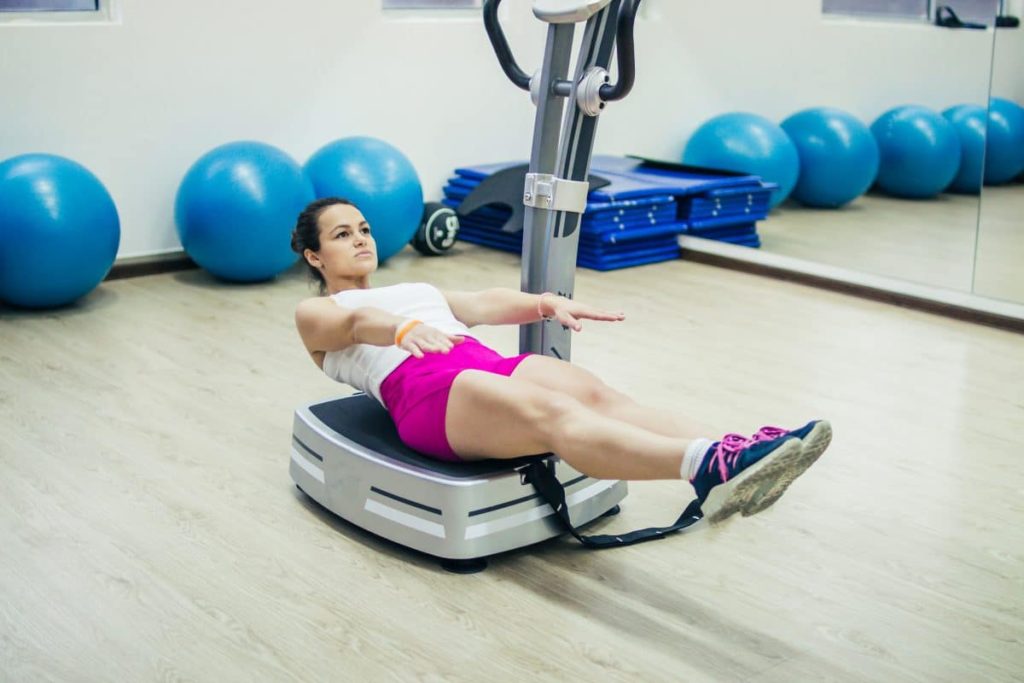
Aware Pilates instructors know that mat class participants need a variety of cues—visual, auditory and kinesthetic—in order to master the repertoire. If they are primarily visual learners, they will learn best from visual cuing. But there may be auditory or kinesthetic learners in the group. And quite often, students may be unable to see the teacher; in these cases, they need clear instructions they can easily embody without having to crane their necks out of alignment or lose control of a particularly challenging move. Three-dimensional visual, verbal and kinesthetic cues prove crucial in these (and all) instances. Combine visual, auditory and kinesthetic cues to create a successful class.
Visual Cuing
When explaining the setup and execution of an exercise, imagine that your students don’t speak your language. This can help you come up with ways to convey meaning through body language. To help people immediately identify an anatomical landmark on themselves, for example, point out that particular focal point on your own body. Not all participants understand where the latissimus dorsi muscle runs, for instance. Before initiating a stretch, show the muscle on your own body by running one hand from the back hip area up to the humerus.
This same technique gives participants a visual demonstration of where they should be feeling the work as well. While cuing leg beats in the side-lying position, give participants a feeling focus by lightly touching the abductors of the superior leg and the adductors of the inferior leg as you mention the working leg muscles. These two visual cues offer a kinesthetic cue as well.
Another visual technique is to move to an area of the room within visual access of all students during a move that has to be done on both sides. Let’s review leg beats again. Since general setup is not as crucial on the second side because students have already seen the exercise, stand and use your arms to simulate the beating-like movements of the legs, thus giving a visual execution cue with substituted body parts. Students who are lying on the floor gain instant visual access to the leg movement. On the other hand, if you remain at the front of the room on the floor, you will be out of students’ line of sight and the risk is high that students will take their cervical spines out of alignment to see you.
You may also want to demonstrate a move before students try it. June Kahn, Pilates coordinator for Life Time Fitness in Colorado, suggests, “When students are in a position such as sitting, where they can see me well, I demonstrate the next move when they are on their last few repetitions. For example, if they are completing a roll-up or spine stretch forward, I tell them to continue finishing that movement while I demonstrate the next one. This saves time and gives them strong visual cues, all while maintaining the flow of their workout.”
Verbal Cuing
Use innovative cuing over habitual cues. Participants pay attention to cues that are fresh and new, but are likely to tune out cues they hear habitually. There are three steps to innovative cuing. First, imagine your clients are blind. Second, close your eyes to help yourself compose specific verbal cues for “blind” students. Third, focus on helping clients tune into something new. Specifically, for the leg beats exercise, you might describe the setup alignment as “imagining the body between two large panes of glass with the goal of not touching the panes.” Or you could suggest that students imagine the superior leg has a raw egg balanced on the middle of the gluteus medius. Stabilization is required to avoid dropping the egg, which would result in scrambled eggs!
Kinesthetic Cuing
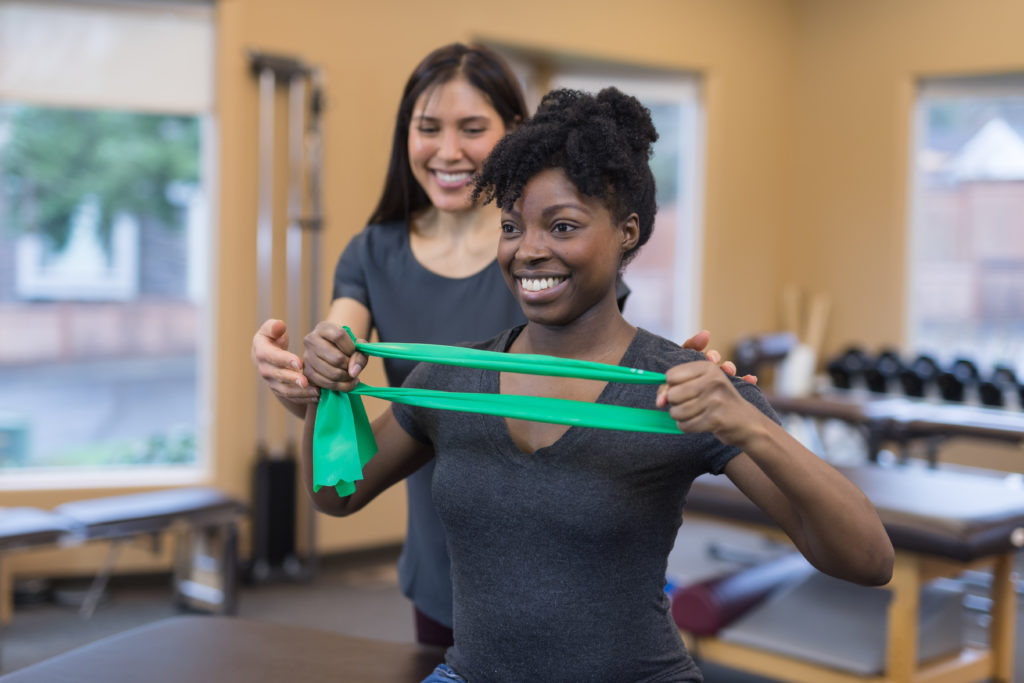
Kinesthetic cues involve helping participants engage as many of their five senses as practical to foster a deeper understanding of the movements. Kinesthetic cues use the word “feeling.” For example, with a single-leg stretch, try cuing, “Focus not only on feeling the stretch in the glute of the leg with the flexed knee but also on feeling the lengthening in the hamstring of the extended leg.”
Kinesthetic cuing raises the issue of professional boundaries and touching. One alternative to asking for permission to touch clients before gently doing so is to help them fine-tune their own kinesthetic awareness. In the Pilates plank push-up, common alignment issues are sagging shoulders, dropped hips, elbows askew and feet too far apart. Sara Kooperman, JD, owner of SCW Fitness Education, suggests approaching the client, dropping down to her eye level, showing your palm and cuing, “Deborah, here’s my palm. I’m going to place it under your chin. Gently bring your chin to touch my hand. Now I’m placing my hand above your glutes; gently lift your glutes to touch my palm. Now I’m placing my palm under your right heel; press down until you feel me.”
Continue this technique until you have fixed most of the issues with the client’s form. “In this way,” Kooperman says, “you aren’t touching clients but inviting them to take responsibility for their own kinesthetic awareness and to move themselves away from problems and toward solutions.”
Three-part cues (visual, auditory and kinesthetic) help the majority of students learn, not only how to follow, but also where to feel most of the exercises, most of the time. The result: more people tune into our cues more often.
The following sample Pilates cuing script is courtesy of PJ O’Clair, winner of the 2008 IDEA Program Director of the Year award, master instructor trainer with STOTT PILATES® and owner of Northeast Pilates Movement Centers located in Boston.
“We’re going to do hip rolls, which is a great exercise for segmental articulation of the spine, and it feels good (purpose). Start with your entire spine neutral and arms long by your sides like this [demonstrate move] and knees bent with feet hip distance apart, like this (visual). Inhale to expand the ribs, exhale to activate your abs. Feel your glutes fire (kinesthetic) and roll your spine off the mat. Inhale at the top, exhale to soften your chest, spread your ribs and sequentially roll your spine down. Visualize each segment of your spine melting down (innovative), and use your abs equally on both sides to create symmetry through the spine. As you start to roll down, notice the surrender of the chest away from the chin, and allow the breath to fully expand the ribs three-dimensionally (innovative).”

Lawrence Biscontini, MA
Lawrence Biscontini, MA, has made fitness history as a mindful movement specialist, winning awards that include the Inner IDEA Visionary Award. He is a philanthropist, presenter, keynoter, and course development specialist for various companies, including ACE, AFAA, FIT and NASM. He also serves on the advisory boards for the International Council on Active Aging and Power Music®, and is an International Spa Association reporter-in-the-field for its #ISPAInterviews series. Lawrence teaches with yoga RYT 500 and decades-long certification experience. His company, Fitness Group 2000 offers scholarships to professional conferences and competitions on several continents. Lawrence runs fit camps in Puerto Rico in the winter months and has authored more than a dozen books.