Keeping Pace With Step
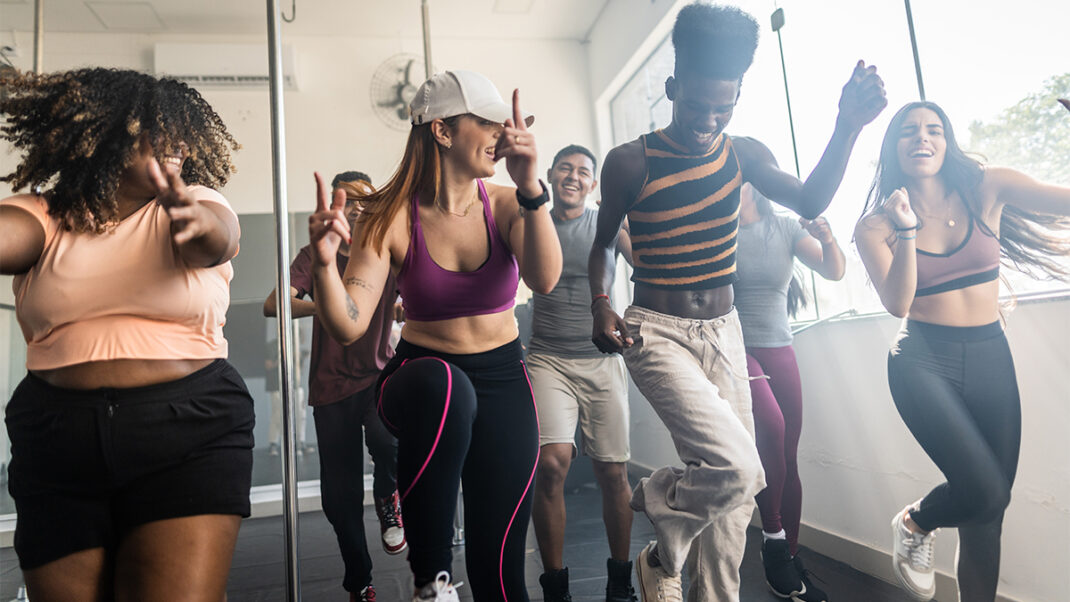
After more than a decade, step classes are still going strong. Our longtime, dedicated steppers are growing ever stronger—or so we assume. And our step teaching awareness is at an all-time high—or is it?
In our quest to offer the most fun, most exciting and most challenging workouts, we may be losing sight of vital safety guidelines related to stepping form, speed and muscular balance. Perhaps even more important, we may have forgotten the reasoning behind certain guidelines. Time and experience reinforce step habits—both good and bad—in both ourselves and our participants. One problematic condition that is on the rise is lower-cross syndrome.
This postural condition is becoming increasingly prevalent in both instructors and participants as a direct result of step speed and movement execution. Fortunately, we have the power to avoid or overcome this syndrome. I have put together an approach called STEP-PACE specifically to address lower-cross syndrome. STEP-PACE is an acronym for Step Posture And Core Exercises, and the acronym itself serves as a reminder that step speed (pacing) plays an integral role in postural integrity. By appropriately applying a few STEP-PACE concepts, we can help our participants improve their posture, relieve low-back pain and restore body balance. Using these concepts we can create classes that prevent lower-cross syndrome instead of exacerbating it.
What Is Lower-Cross Syndrome?
Muscle imbalances are a frequent result of step classes because stepping involves repetitive recruitment of the hip flexors, quadriceps and tensor fascia latae. Also, some classes move too quickly, and some participants and teachers engage in step classes as frequently as four or more times per week.
Gone unchecked, muscle imbalances caused by stepping create lower-cross syndrome. In this syndrome, the imbalances between the hip flexor, hip extensor and trunk muscles are significant enough to create an anterior pelvic tilt of 20 degrees or more (Cibrario & Stone 1996). The lower abdominal muscles, hip extensors and thoracic spine extensors (and sometimes the superficial cervical flexors) become lengthened and weak. Conversely, the hip flexors, spinal erectors, rectus femoris and tensor fascia latae become short and tight (Kendall 1993).
Look around the room next time you teach your regular step class. You may notice that many of your participants stand with an exaggerated lordotic curve (the pelvis tips forward, causing the low back to hollow deeply and the belly to protrude). Or, to compensate for hip tightness, participants may stand with the upper body leaning forward moderately from the hips. Some steppers may be unable to flex (round) the lower back properly and may complain of a stiff low back. You may also see rounded shoulders and heads thrust forward. All these postural signs reflect the muscle imbalances associated with lower-cross syndrome and are the result of poor exercise technique, faulty biomechanics and overuse.
What Causes Lower-Cross Syndrome?
The good news is we can control some of the factors contributing to our participants’ postural and musculoskeletal health. These factors include:
The Nature of Stepping. Regularly stepping onto and off a fixed platform for 30 to 45 minutes per session requires intense and repetitive recruitment of the hip flexors, quadriceps and tensor fascia latae. To balance out this repetitive recruitment, stretching and strengthening exercises need to be included in every step class. Create a repertoire of stretches and strengtheners that extend the hip flexors, lengthen the quadriceps and stretch out the tensor fascia latae. Also include exercises that strengthen the hamstrings and gluteal muscles. In essence, simply apply the principle of maintaining balance between agonists and antagonists.
The Pace of Stepping. When step was first introduced in 1990, music speed guidelines were set at 118 to 122 beats per minute (bpm) (Reebok 1990). More current Reebok guidelines suggest 122 to 128 bpm as the maximum stepping speed (Olson 1996). This speed provides a safe cadence for all experience levels and allows participants to step on and off their platforms vertically with good posture.
Unfortunately, many instructors today have chosen to ignore these safety guidelines, and stepping speed has crept up to 144 to 150 bpm, the pace of high/low-impact workouts! According to step researcher Michele Olson, PhD, “Stepping at higher music speeds [faster than 128 bpm] can affect an individual’s ability to perform movements within a complete range of motion. It can also result in improper body alignment and loss of posture, caused by continuously bending forward at the waist to complete movements” (Olson 1996).
Fast music forces participants to adjust their stepping posture by hinging forward from the hips. People just don’t have time to stand up straight and move vertically upward if the pace is too quick. To compensate, they move horizontally forward rather than vertically upward. Assuming a horizontal body position also causes them to step back far from the platform, making vertical posture even more difficult to achieve. Hinging forward from the hips shortens the hip flexors more than stepping does in general; this motion can also strain the lower back.
Slow your music to 128 bpm and observe the difference in your participants’ posture. (For further details on step speed and injury prevention, refer to “Step Guidelines and Safety Benchmarks” by Jessica Smith, ME, in the February 2000 issue of IDEA Fitness Edge.) Remember that although most premade step music lists the bpm for each song, each stereo system varies slightly in pitch. So test your music selection, counting the bpm for a full minute to be sure of actual, in-class pacing. When you don’t have time to count beats, use the “footprint check.” Using any step pattern, you should be able to step down from the platform and place your entire foot (create a full footprint as if stepping in sand) on the floor before you go back up onto the platform. If you have time to put only the ball of your foot down, the music is too fast—your participants will not be able to hold good form and posture.
How Can STEP-PACE Help?
Just as certain moves—if repeated often enough—can create lower-cross syndrome, other moves can reestablish balance. Essentially, think through the four relevant categories of counteractive movement: posture work, core activity, strengthening exercises and stretching. Then incorporate the following cues and exercises into your step classes as “antidotes” to lower-cross syndrome.
POSTURE WORK
Set the tone for your class right from the start by using some simple body alignment cues to help participants create axial elongation through the spine. Implement the following cues during the warm-up and throughout class:
- Lengthen your spine by reaching the tops of your ears toward the ceiling.
- Draw the pelvic floor up toward and out through the top of the back of your head.
- Create the longest distance between the top of your head and the tip of your tailbone.
- Point your tailbone directly down to the floor as you try to scrape the top of your head on the ceiling.
- Glide your shoulder blades down your back and reach your fingertips to the floor as you stretch the crown of your head toward the ceiling.
Try using the following STEP-PACE checks during the stepping portion of class to monitor your participants’ posture. Don’t attempt to use every single check during every class. Rather, assess your classes and use the checks that will help the most. For instance, if you notice many participants flexing from the spine during one choreography section, run through that section once or twice using the Triangle Check described below.
Triangle Check. Place your hands behind your back, palms turned outward, thumbs touching end to end and index fingers touching together at the last joint (creating a triangle between the thumbs and the index fingers). Place your thumbs at your lowest ribs (about navel level) and point your fingers toward your sacrum, keeping them flat against the back. If you maintain good posture during stepping, your fingers will not move away from your low back. If you round forward from the spine, your thumbs will stay put, but your fingers will pull away from the back. Use the Triangle Check to ensure that participants do not flex from the spine as they step.
Posture Check. After you have taught a 32- to 64-count combination, replace the arm moves you practiced
in the combo with the following technique. Raise your arms out to your sides, bend your elbows and interlace your hands behind your head. Open the elbows wide and stand as tall as possible. Use this Posture Check with your participants as you run through the combination one time. The technique will help your steppers stand up straight and become aware of axial elongation.
Step Check. This simple check confirms that participants are staying close to their steps. Every so often, have participants glance down as they step off the platform. They should be no farther than 12 inches away from it. Remember, the farther away they are, the more likely they are to bend forward at the hips.
CORE ACTIVITY
Core Check. This technique helps identify and maintain neutral posture. While standing, position yourself in neutral posture. Place your right thumb at the base of your lowest ribs (on the right side), with the middle finger of your right hand on top of your hip bone. Repeat this procedure with the left hand on the left side of the body. Note the distance between the thumb and finger of each hand; if you maintain neutral posture when performing movements, this space should not change. Have participants use the Core Check while performing hip extensions, hamstring curls, knee lifts and leg abduction lifts.
Core Exercises. Do you put creative effort into your step choreography but randomly choose your abs and resistance exercises? Forget traditional curl-ups (crunches) with bent knees and head lifted. Curl-ups overemphasize recruitment of the upper fibers of the rectus abdominis and contribute very little to stabilization of the spine (Ellison 1995). Curl-ups also do very little to strengthen the oblique muscles, which are weak and elongated in people with lower-cross syndrome. Instead of curl-ups, focus on core exercises that recruit the lower fibers of the rectus abdominis (i.e., its lowest section, near the pelvis), the external and internal obliques and the transverse abdominis. When these muscles are strong, they counteract the strength and tightness of the hip flexors and provide functional stabilization for the back (Kendall 1993).
STRENGTHENING EXERCISES & STRETCHING
Hip Extension and Thoracic Spine Extensor Exercises. Too little attention is paid to the hip extensors, including the hamstrings and gluteals. Frequently, the spinal extensor muscles are completely ignored during the strength portion of class. Resistive hip extensor and thoracic extensor exercises should be a part of every step class.
Stretches for the Strong, Tight Muscles. In lower-cross syndrome, the short, tight muscles are the hip flexors, spinal erectors, rectus femoris and tensor fascia latae. It is vital to elongate these muscles to help reverse the effects of repetitive stepping. Use appropriate stretches to help restore body balance, and be sure to include stretches for the calves, hamstrings and gluteals, as well as the hip external rotators, hip flexors, quadriceps and tensor fascia latae.
PACE and Balance!
As a step instructor, you can make a big difference to your participants’ posture by being aware of the muscle imbalances caused by intense stepping. By adding
a few well-thought-out cues, stretches, body checks and strengthening exercises, you can make sure you always provide a balanced workout. Think of the STEP-PACE techniques described here as tools you can use to help participants restore body balance in each segment
of your classes. Good luck as you step up to the challenge!
Tensor Fascia Latae Stretch
Position 1. Stand your step platform on end, holding it with your left hand. Cross your right foot in front of the left. Press the left hip into the step as you lean away from it to the right. You should feel a stretch along the left side of the hip. 90/90 Pelvic Tilt Core Strengthener
Position 2. Now step with the right foot into a side straddle. Keeping the hips square, reach the right hand over the head toward the step feeling a stretch along the right side of the torso. (Repeat both positions on the other side.)
90/90 Pelvic Tilt Core Strengthener
Position 1. Lie on your back with your feet in the air, creating 90-degree angles at the hips and the knees. Place your hands in front of the thighs just below the kneecaps, with fingertips pointing to the ceiling. This arm position helps monitor the position of the knees, which should stay above the hips. Allowing the low back to soften, imprint the lumbar spine into the floor using the low belly muscles. However, be sure to anchor the sacrum and lower-posterior ribs to the floor using the abdominal muscles. Inhale.
Position 2. As you exhale, strongly contract the obliques and transverse abdominis in order to draw the navel toward the spine, and tilt the pelvis until the tailbone rises slightly from the floor. Use the hands to monitor the movement physically and visually. Keep the knees from pushing against the hands. Instead, lift the knees up toward the ceiling as the lumbar spine tilts into the floor. The movement is subtle and small, with exact form affecting its effectiveness. Think of contracting “under and up” rather than into the chest.
P. Anderson
Paula Anderson, MS, is co-owner of Fitness ETC (www.fitness-etc.com), a Central California-based service providing fitness instructor training. An IDEA presenter and master trainer for the Star Trac® Precision Cycling™ and Resist-A-Ball® C.O.R.E. instructor training programs, Paula has taught group exercise classes since 1976 (when the entire warm-up was static stretching!). A former champion bodybuilder and personal trainer, she holds numerous fitness certifications.