Crystal-Clear Cuing for Indoor Cycling
Be smart about the exertion scale you use to help participants get the best ride.
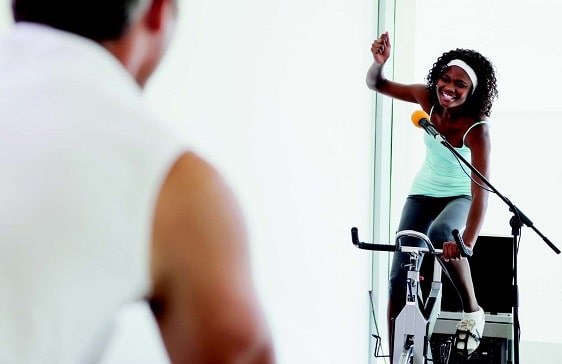
Walk by any indoor cycling studio when a class is in session and you're likely to hear a variation of the following:
"I want everyone at a 2!"
"Push yourself to a 7 and hold it there for 30 seconds!"
"Let's start at a 3, turn up to 6, and then come back to a steady 4. Go!"
The key to unlocking a fantastic cycling class is somewhere in those numbers, but your members may find themselves shut out if they don't know what you're referring to. What's the key? Clarity about what those arbitrary numbers mean.
Excellent instructors use a system to describe what they expect for performance, and it's usually a combination of what they've learned in certification courses and what they've gleaned through real-world experience. Indoor cycling teachers often rely on numbers to convey effort. While this is a good idea at face value, there are many variations on a theme. Even within the same facility, a 3 at the 9 a.m. class may represent an entirely different work level than the 3 in the 10 a.m. class. This disparity can leave participants' heads swirling.
Number systems are great as long as everyone is 100% sure what the digits represent. You don't need to use the same scale as everyone else; you just need to set your students up for success by cuing clearly. Let's go through a few steps to ensure success in your next class.
Introduce Your Scale
Harness the warm-up to prepare and educate your class. Saddle up, get everyone's legs moving, and talk about the numbers you plan to throw their way. What does a 2 mean? How should it feel? What's the highest number on your scale? Will there be multiple ways to achieve numbers? Do you base your scale on the Rating of Perceived Exertion, tension, speed or a proprietary system provided by your certification? Lay it out for people.
For example, you might say, "A 5 represents all-out effort. Our intervals into zone 5 are brief, and you can reach them using speed against tension."
Explain the "Why"
When purpose drives us, we work harder. Let your students know how your numbers correspond to the physiological aspect of the workout. Which number corresponds to recovery, and why is that important? Which number takes them into an anaerobic zone? Let them know why specified intervals are shorter to prevent injury. Say what number represents moderate-paced work, and describe the value for a well-rounded workout.
For example: "When you hear the number 1, it's time to rest. These rests will follow big efforts and set the stage for the next big effort."
Rehearse
Once you've explained your scale, rehearse it! Practicing is the perfect way to "feel" and connect with numbers. Play with speed and tension in short bursts. Let attendees know that during the workout, intervals will be longer and harder. Don't go to the top of your scale in the beginning of the warm-up. Save the larger numbers for later, when the body is ready for a significant effort. Do, however, let attendees know that harder drills are coming.
For instance: "We've been rolling in a comfortable working zone. Increase your tension just a bit, along with your revolutions per minute. You should feel that you're working harder and you'd like to slow down, but stay in a moderate zone. This is what zone 3 feels like. We'll hold this effort for 1 minute now, but for longer periods later."
"Draw" a Map
If you were to ride a bike outdoors, you'd likely plan a course ahead of time. You'd know if you were going to hit a big hill, spend some fast miles on flat ground, or race a friend. Do the same for your class, and give them the lay of the land. They'll know what's coming and will push through each phase rather than saving for the unknown push that may never happen.
Some instructors fear they will scare students by forecasting challenges. Don't worry about that. Lay down a tough lesson plan and coach participants to get the best out of each phase. They will leave feeling they've accomplished more than they would have in an average cycling class, and they'll look forward to coming back to see if they can do it again.
For example, try this: "After the warm-up, we'll hit a long hill for two songs. We'll come back to flat for a series of sprints, and then we'll encounter a stretch of moderate-to-hard endurance work. We'll climb another hill, but this time we'll incorporate speed work against tension as we climb. We'll finish with rolling hills as we cool down."
Define Expectations
Knob or lever tension will vary considerably from one rider to the next. To exert the same level of effort, the 30-year-old triathlete will need a different amount of tension than the 70-year-old sitting next to him. How do you cue to such a disparity in abilities? Set baselines.
To establish those baselines, experiment with tension. Use the warm-up to determine tension for a flat, for standing, for a flat sprint and for the beginning of a hill. If you have power monitors, ask class to make a mental note of the numbers. If there are no monitors, ask people to remember the position of the knob or the feeling in their legs.
- Flat. Ask students to increase tension until they feel a flat road, "as if riding a real bike on flat ground with some gear." Discourage riding with no tension.
- Standing. Guide class to increase tension until they feel comfortable standing. The knees should feel supported and the body should be able to stay solidly in control.
- Flat sprint. Either keep the tension the same as in standing or reduce it a little bit. This allows for fast rpm without wobbling out of control or bouncing in the saddle. Remind your class that speed against tension gives the most bang for the buck!
- Beginning of a hill. Heavier than standing tension, this should feel supportive and challenging, with room to get much more difficult.
Once you've established baselines, you've also set the reference points for cuing tension. For example: "Set your tension knob to a beginning hill. We'll increase our tension 5% (or a quarter turn) every minute for the next 5 minutes while keeping this steady pace to the beat of the music."
Repeat, Repeat, Repeat
Once your number system is clearly defined, you can just call out the numbers for the rest of the class, right? Wrong. Repetition is the key to success. In a word or two, redefine what each number represents. Not only is there always someone who comes in late and misses the introduction, or a student in the corner who doesn't pay attention, but people want to relax and let you do the thinking. They don't want to have to remember what you said last week or even 10 minutes ago. Remember, they may have taken a class yesterday where a 3 meant something completely different.
For example: "Here we want to be working in zone 3. You should feel out of your comfort zone, but moderately so."
Be Consistent
If you have a room filled with regulars, do you still have to cue all of this? Yes! Don't worry about sounding like a broken record. Even die-hard regulars bring something different to your class each time. They may be exhausted from a sleepless night, or they may be ready to rumble after a great day of rest. Use your introduction and rehearsal time to set the stage. Help attendees define parameters and goals for their workouts. Reassess the tension needed every time, as bikes are calibrated differently and participants' energy levels vary. For example: "How did our first set of cardio intervals feel? Are you feeling strong today? Do you need to add to your tension for the next sprint?"
Phew! That is a mouthful of cuing, but well worth it. Your students come to be pushed by you, to reach their goals, and to enjoy themselves. The technical side of it is your job, so do it well, and do it every time.
When you prepare your playlists for cycling class, do you know how well the music will map to your exertion scale and class design? It's disconcerting for participants to settle into a gradual incline—enjoying your carefully selected tune, their legs matching a certain cadence and pace—only to have the beat change unexpectedly. Music sets a specific mood, especially in indoor cycling classes. Take the time to listen to and practice your playlists, to ensure they match up well with your overall theme and drill sequence.

Pamela Light, MA
Pamela Light is a group fitness instructor and personal trainer in Rancho Palos Verdes, CA with a bachelor’s in Exercise Physiology, a Master’s in writing, and 25 years’ experience in the fitness industry. You can find videos of Tape Box workouts in her Facebook group, Pamela’s Light and Fit Community.